
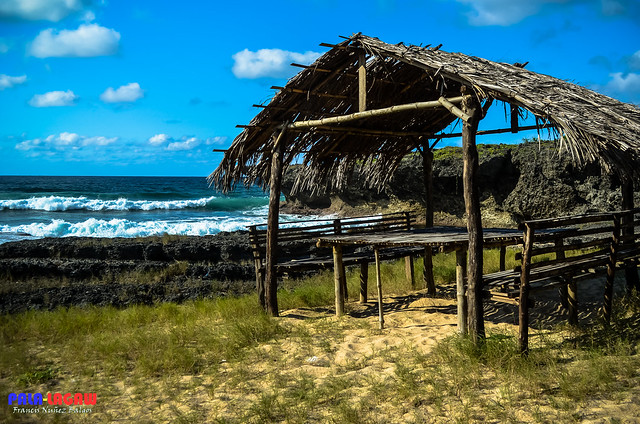
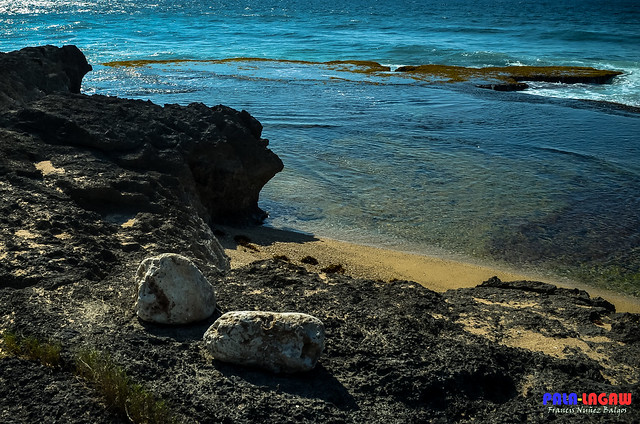
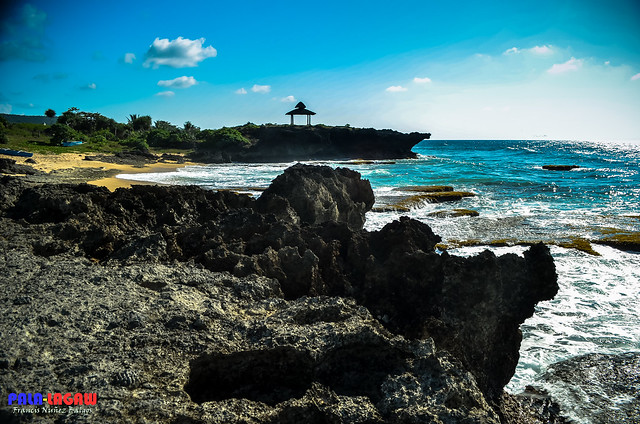
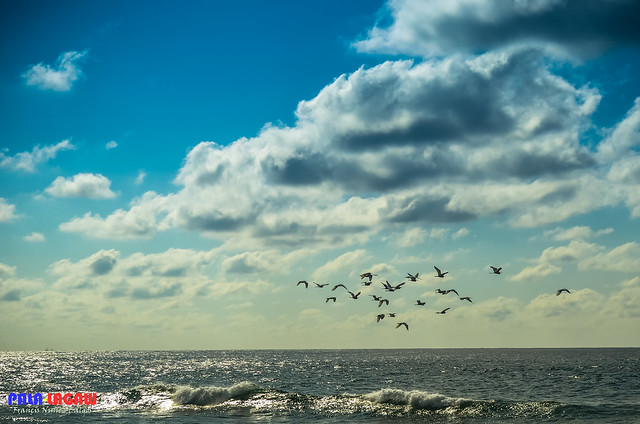
Photos Of Bolinao Rock Formations
Shooting Landscape Photos In harsh Light
As a traveler with limited time to stay in a particular location, I have
to make do of every photographic opportunity that presents itself. This
post is to describe why its not ideal to shoot landscape photos in
high or mid afternoon where light is harsh and makes for over exposed
photos, and the measures to counter them.
If you are familiar with my travel blog www.pala-lagaw.com then you should know, I've already posted these photos in there with accompanying description of my experience in Bolinao, check this link on: Bolinao | Scenic Rock Formations
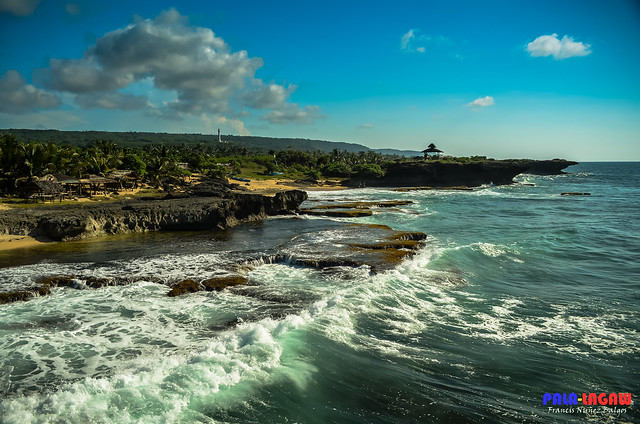
The situation calls for some few tricks I've learned. The taking of these photos wasn't the best of times for landscape photography as it is mid afternoon. Though the sunlight is already on the slight angle on the east, it is still an overhead light, hence it cast light on top of the rocks, providing a shadowed part on the details of the rocks, the water aside from the white bubbles would reflect light back to the lenses rendering parts of the frame to be exposed.
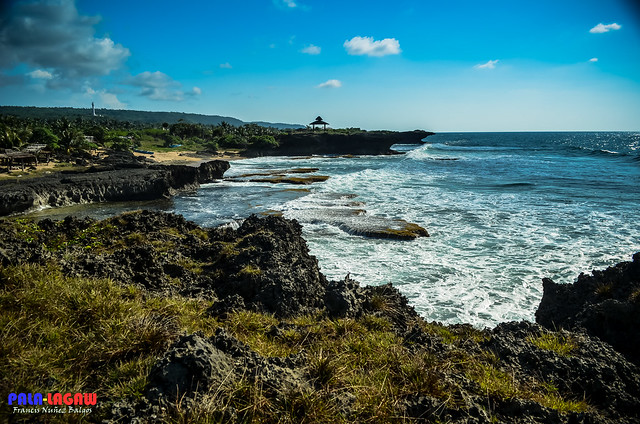
Making use of a filter. The secret of most professional photographers are special filters that can be screwed in or mounted at the end of a camera lens. Well of course aside from the basics in landscape photography which is keeping the photo as wide as possible, the horizon as straight as the warping and vignetting from the lens could avoid, and keeping it away from the center of the frame.
Using ND Filter
Going back to the using filter, the obvious filter judging by the strong movements of the waves crashing in the rocks would be Neutral Density Filter (ND Filter). ND filter would allow you to open wide the aperture levels and take slow shutter speeds, while using the lowest ISO levels your camera has, this would make the waves appear misty and sinuous while keeping a sharp contrast of the rocks. ND filters doesn't change the photos white balance. Its the real deal among filters and some even refer to it as black glass, because it is a black glass that you screw in the lens. Unfortunately, since I don't really like to spend too much on this photography hobby, I don't have any ND filter at the time that these photos where taken. Now looking at these photos and knowing that they could have been better is my regret.
Using CPL Filter
Using Circular Polarizer (CPL) can do the trick, and fortunately one that I have and had made use of a lot. Ever wonder how you can take pictures of details underwater like rocks while you are in a boat or looking down at a pool. Take a cam phone or a Digicam and all those details will be lost in the glare of light. A CPL filter removes that glare significantly, it also shows a greater dept of tones in the clouds. Without CPL, the sky on an bright day would be exposed, sometimes you won't be able to capture interesting cloud formations. There are some rules that can be checked for when to best use a CPL filter, check this great read on Seven Rules for Effectively Using a Polarizer.
Notice that I didn't shoot the photos directly where the source of light is, but rather took the angle where the sun reflect sideways. This allows the CPL to capture the clouds in varying tones and reduce the glare from the sky. I know, this goes against those who like to hash tag in twitter or instagram #nofilter but you see, it would be more interesting to take interesting photographs as they come rather than using the one click edits of some easy photo editing software.
I've used CPL filter extensively, though I also use a UV filter. The UV filter have little or no use in your photos except perhaps to protect the lens. You can't use CPL filter at all times, its not as scratch resistant as UV filter are, but remember that when you are out hiking, or under the rain or island hopping, a CPL filter would be a great addition and to achieving good landscape photos. I do not deny that my photos are processed, but know that the effects of filters cannot be duplicated by any software. It is better to obtain great photos as raw as they come from your camera, processing would then just be a tool to help you enhance them.


All Rights Reserved
Shutter Mix by Pala-lagaw reserves the right for any watermarked pictures posted
No pictures should be downloaded or copied without permission from the blogger.
you did captured the beauty of Mother Nature. Awesome rock formation.
ReplyDeleteNice capture Francis! Your photos reminds me that I have camera to play with during weekends
ReplyDeleteBolinao is really beautiful from what I heard and from your photos. I hope to finally visit the place soon.
ReplyDeleteGreat shots. I wish I could produce an output as great, as clear and as fabulous as this. It's time for me to buy DSLR camera.
ReplyDeleteThis place looks like where KTV girls are being taken videos of as a background. Haha. Great pictures! :D The waves, birds, rocks and streaks in the leaves are sharp.
ReplyDeleteBolinao is really, really beautiful, and your shots made it even more special. Great job on this!
ReplyDeleteKa-bibo ng mga pictures mo . I am not yet familiar with the terms you used in photography as i never had and used DSLR in my work but i ma interested to learn . I am quite interesting that you do not like to shoot on high noon which is my favorite time for shooting as i feel that light is my best friend for my P & S camera ... people really have different styles and preferences .
ReplyDeleteThose are outstanding shots! Makes me want to go to Hildalgo and buy a CPL lens filter now! =)
ReplyDeleteYou did great shots with your filters and made me think of going back to photography after quite some time.
ReplyDeleteThis i have to thank you. I've never learned much about photog' filters and how to use them. I've been having hard time covering events because the only friendly option i can consider is the auto-mode shot.
ReplyDelete